Showing posts with label French bread. Show all posts

Friday, 20 June 2014

Going French with Rillettes and Fougasse

Some weeks ago I was very much in the mood for cooking some French food and improve my knowledge in that cuisine. Well, apart from the option to look things up on the net, I have a few books on French cooking. One of it is The Little Paris Kitchen by Rachel Khoo. It's a lovely book and the recipes work excellently. I selected some of them and worked myself through them during a week.
I like to share some of the results with you today as France is also playing Switzerland in the World Cup today. However, I will not share all of them, I need to reserve a bit for later.
Therefore today I like to concentrate on two things: Rillettes au porc and Fougasse aux romarin, avande et from age du chèvre.


 First to the rilletes with pork. If you find the right shop you most probably can by it ready in a jar. However, it's so simple and worth a try. You need pork belly, some bay leaves, rosemary, thyme, salt and pepper and some time. It goes into the oven for 3 hours at 130 °C. Afterwards you can easily shred the pork (rind cut off) and jar it up and eat it with some lovely homemade bread and a glass of red wine.
If you care to make a mess in your oven you can throw the cut off rind under the grill and let them get crispy. Great, you get a crispy, fatty snack, hear some crackling sounds from your oven and get the chance to clean your oven.
Guess what I did ...


I just wanted to test some pork cracklings, too.
Anyway, I enjoyed the rillettes most of it together with the fougasse and the red wine.


Sure, you need some time as well to make the fougasse, but hey, it's all so lovely. What I liked about this fougasse version was, that it included lavender and goat's cheese.
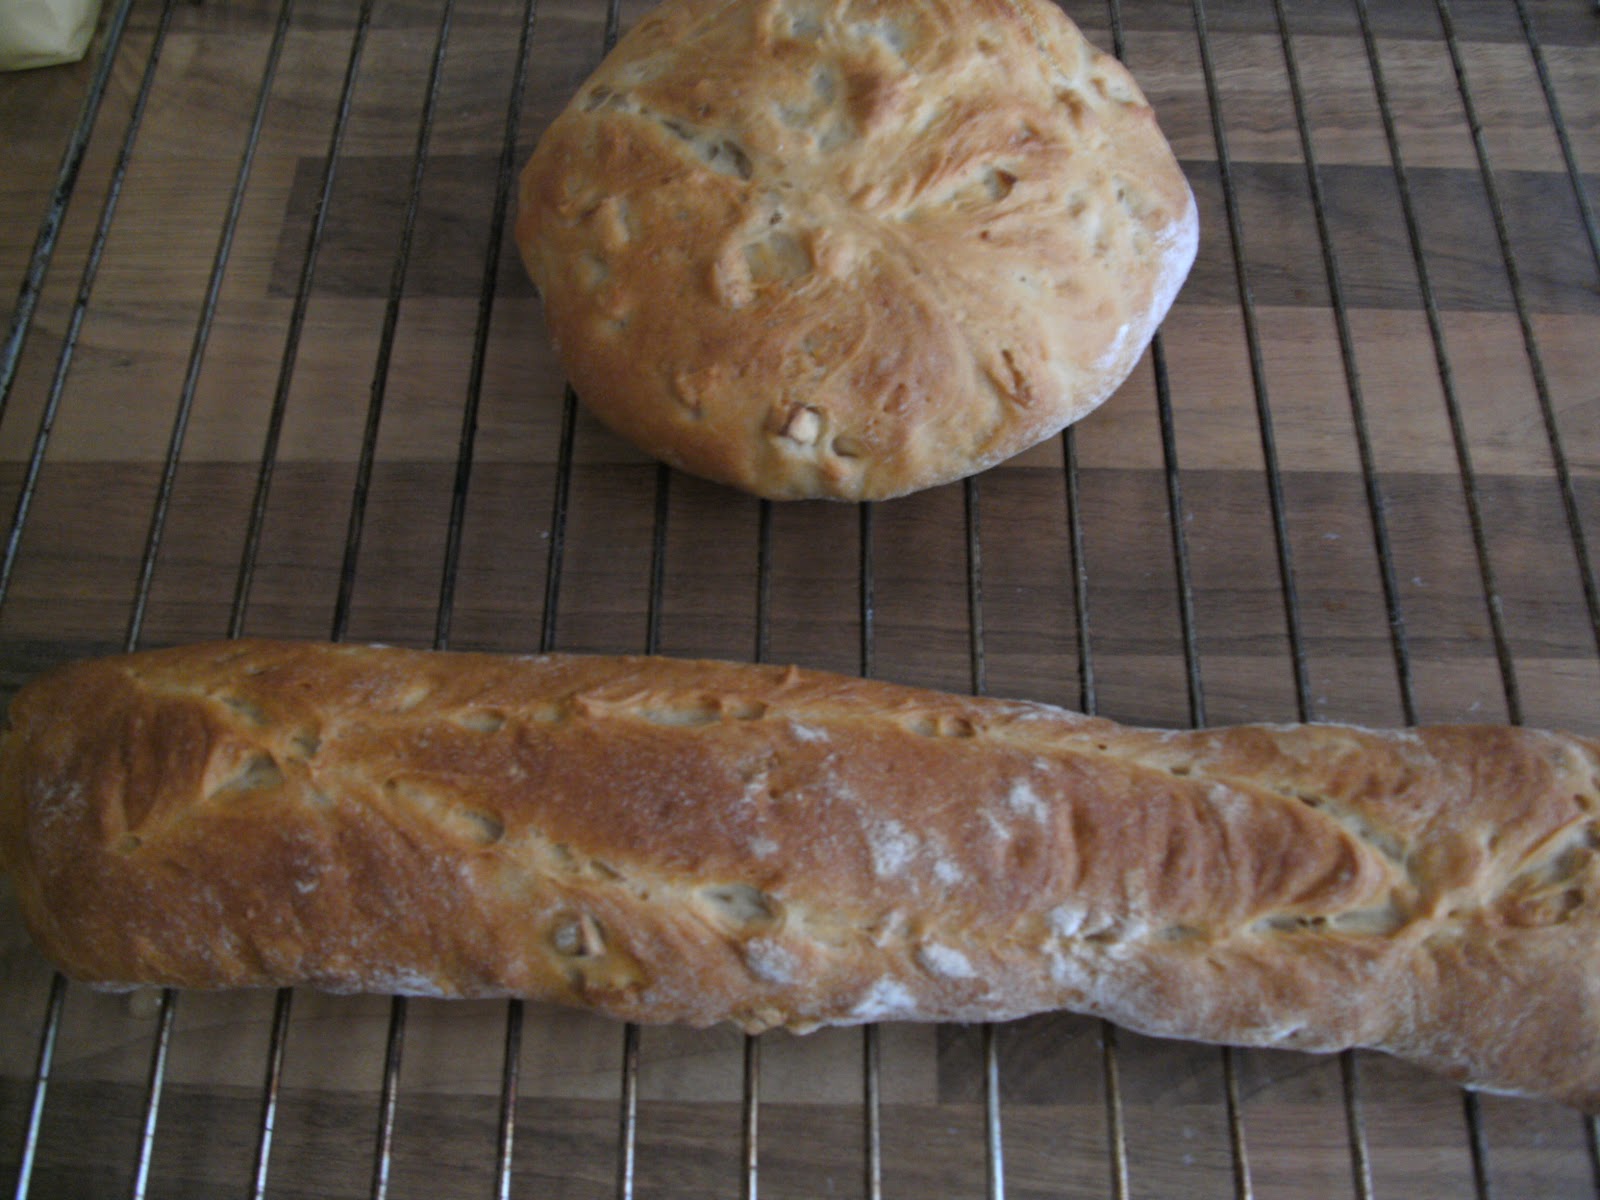
You make a yeasty dough with 10 g dried yeast, 400 g flour, salt, dried rosemary, dried lavender and olive oil.
Then, you know, there is some kneading involved, rising, proving and all that lot, yes shaping. Apart from that we need to fit in the goat's cheese. Push pieces of 80 g of firm goat's cheese into the bread before you let it rise for the last time after the shaping.
The bread needs about 20 minutes at 210 °C in the oven. 
The end result is lovely. So, if you want to try it, you either have to try it as it is or have a look at the book or ask for further details.


Now you get also a closer look at the bread. I enjoyed it very much. So, do you like to have a bite?


If you like to have this ready for the football match today, I have to inform you, that you better have to hurry. Otherwise ... you need to have something else.


I add this to our ever increasing collection of posts for the World Cup 2014 and Bloggers Around the World.

Wednesday, 6 March 2013

The Show must go on - Fougasse de Chocolat et Fraise

Maybe you have been hearing me talking about cooking through a complete book with all it's recipes. As far as I noticed I have been talking about it since I started the blog and ... it hasn't materialised. But ... I might start one day!
On the other hand, if you have read posts on this blog also in the last year, you might have noticed that I started to bake myself through a book, namely Secrets of a French baker. I haven't even finished that. In fact, I haven't done much for it, either. However, it's mostly bread in it and each recipe takes several hours to complete. It's good exercise, though, because a lot of kneading is involved. 
It happens to be the case at times, that I like to join blog challenges. There is an ongoing one done by Lavender and Lovage and What Kate Baked. It's called Tea Time Treats. This month Lavender and Lovage is hosting and ... très bien ... the them is: Ooh La La! French Tarts, Cakes, Bakes and Pastries.

Tea Time Treats

That is a perfect opportunity to let the show go on and do another recipe from that book: Fougasse. That is a kind of bread with a lovely filling. While the book is suggesting 7 different savoury fillings I decided to go for sweet one with chocolate spread and strawberry jam. I would have loved to add some fresh strawberries from the garden, but obviously it isn't the time yet.
Somehow I managed to do something wrong while preparing the bread, but I don't take the blame all on myself. The recipe - strangely - didn't state what to do with two ingredients and as I didn't bother to think about the recipe and simply went step by step, well, I didn't use the one tbs of soft butter and 3 tbs of milk powder.
I only did as follows:
Sift 225 g of strong baking flour and 225 g of spelt flour together with one and a half tsp of salt into a bowl. Then added a sachet of dried yeast and added bit by bit 240 ml of lukewarm water. I used a hand mixer to ... eh ... mix it. Then I used my hands to make a solid ball of dough. I left it on the kitchen work surface for 10 minutes and did something else.
I did my exercise by kneading the dough for over 15 minutes.
Then I carefully made a half flat half ball kind of object and placed the dough like this into the bowl, covered it with a wet kitchen towel and left it for 45 minutes. I went to do something else. Can't remember what!
I might have read something or just checked things on the computer, but who knows or cares.

I took the dough again and divided it into two balls, which I placed one a floured kitchen towel and covered with the other still wet kitchen towel and left the dough again for 25 minutes, while doing something else. In between I noticed I forgot to roll the bowls in coarse sugar. So I tried to fix it and continued  to wait for the 25 minutes to end.
Now I started to heat up the oven to 220 °C. The two dough balls were flattened and stretched to two rectangular dough pieces.


On one side of each rectangular dough piece I smeared first some chocolate spread and then some strawberry jam. On the other half I made five incisions respectively. After that the sides with the cuts went over the chocolate jam and I tried my best to seal the bread. Then I transferred the breads to a baking tray and brushed them generously with some egg wash. Finally I sprinkled sugar on top and put the tray for 20 minutes into the oven.


They came out like this. I expected the incisions to be open, but maybe it was better that way so there was no chance for the filling to seep out at all cuts.
First of all I thought to do some arranging and get a nice picture. I put the breads on a wooden chopping board and started thinking ...


... but to no avail. I got no idea on how to do it. Therefore I simply cut them open ...


As you see ... eh ... you see quite some bread and not so much filling. Maybe flattening the dough a bit more and adding more filling would have been something. Nevertheless the fougasses tasted lovely ... maybe that would be something for a chocolate lover.
Well, I'm not promising now, that the show will go on and you find a bread here on my blog every week, but still I will be trying the remaining recipes from that book ... one day ... one day ... in the future.
Oh, well, I have to leave soon for the airport. Just managed to finish the post. Fine, I still have a few more minutes ...

Thursday, 22 November 2012

Secrets of a French Baker and Random Recipe

Can you keep a secret? I can and that's why I'm not telling it to you. Therefore this very secret has to remain as it is ... hidden in some dark corners of the mind. Well, I don't know whether it is that dark back there.
After that being said and done ... done? We haven't done a thing!
Anyway, we can go into business now. Not that kind of business. Let's talk Random Recipes. Here a brief preview before we go into details ...


This month it was Dom's idea from Belleau Kitchen to connect the random recipe to the participants individual birthdays.
As in the case with Dom I was born on the 24th. The month has to remain a secret (again).
That fact would lead in my case to the book Confessions of a French Baker by Peter Mayle and Gerard Auzet.
I already did quite a deal from this book. Originally I planned to try every single recipe from it and post about it. Somehow, I didn't continue at one point.
However, time to open the book at a random page.
Done!
No, I think it's not right, if you have a bookmark in it. The book would open automatically at this page. Therefore I have to use the randomizer again for that.
So, try again!
Done!
No, I did that one already. Another go is necessary.
Done!
Arrrrgggggghhh!
Had that one as well. But I know there are still some recipes in that book, which I didn't try.
The randomizer has to roll again and ... 
... and ...
... and ...
.... and what?
Oh, something I didn't try so far, although the methods of preparation are quite similar.
Here we go for it then: Onion-White-Wine-Bread.
We need about 450 g of different flours, half strong wheat flour and the other one spelt. Of course we need onions.
They are first browned in butter and then deglazed with the white wine ... set to the side.
Now we are ready for the 'lovely' part. Sifting the flour into a bowl ... pinch of salt ... dried yeast over it. Have some nice clean hands ready. Pour in a mixture of fat from the pan (without the onions), white wine and water (altogether 300 ml).
It's time to use those nice clean hands and knead everything to a lump of dough, which might well look like this ...


... rest for 10 minutes to get ready for the real action. In fact, it is just the dough that needs the rest, hopefully not the baker, or otherwise he won't make it till the end.
We have to activate the gluten in the dough now. That means some vigorous kneading for about 20 minutes. If that isn't exercise again. 
Somehow I so often end up with those kneading jobs for random recipes ...
After we made it through the kneading, we add the previously mentioned onions.


Then we leave the dough to rise for 45 minutes. In connection with yeast I found it always useful to put a damp kitchen cloth over the bowl, where the dough is rising. If need be, now would be good to rest ... but there are always things to do ...
... don't get too lazy. Carefully take the dough from the bowl and make two smaller lumps out of it. Set them on a kitchen cloth covered lightly with flour ...


... and cover with the damp cloth again for 25 minutes.
Once that time has passed again, take those lumps and flatten them. At the same time you get out the gas from the dough. Try to get the dough into a rectangular shape.


Then fold at the long side towards the middle as you hopefully can see in the following picture ...


... and finally you fold the other side towards the middle. With the folding edge facing down place the bread shaped dough back on the floured kitchen towel. Cover it once more.
Leave things for another 45 minutes.
What would you do with 45 minutes?
Having spent the time hopefully in a productive way again it's time to heat up the oven to 230°C. Get your bread onto a baking tray with the folding edge downwards as well.
Brush the bread with water. The water is a vital key to get a nice and crispy crust.


Slash the bread quickly with a knife in a candy kind of shape. Before you put your bread into the oven, spray some water into your oven to get some extra steam for the crust.
Then put your tray into the oven for 20-25 minutes.


Let the bread cool down a bit before you devour it. Maybe you have a soup or stew ready for that.
That's it! I hope I didn't reveal any secrets here. Anyway, it has been nice again to have a part in random recipes this month ...


Sunday, 8 April 2012

French baking - bâtard with red wine and walnuts

The bread baking spree goes on. Or shall I say, time for exercise. Considering the amount of kneading necessary you don't need to go the gym. Well, at the moment I have to, it's prescribed from the doctor. However, I would say: "Baking a bread a day, keeps the gym away!"
Coming back to the baking itself, though, now it's time to use red wine for the bread. Also with this run I reduced the amount of liquid used, that is just 200 ml - half water and half red wine. The result looked nice to me. In the first step the walnuts come to the dough when it starts looking like a dough. The recipe said to use 300 g of walnuts, but I just used the amount I had left at home. To be honest, I would have had a lot of more walnuts at home, even more then 300 g. The only problem, they are all whole nuts, so cracking them open and all the work ... I was a bit too lazy for that today. I can live with it.

Finished product
Again, I used cling film to cover the rising dough, but this time I oiled it lightly as I learned it from the Cardamom Twists from Scandilicious. You see, bit by bit you can learn things and improve.
As you can see on the picture (hopefully you see it), the crust looks quite nice. Today I was not so shy with the knife and cut a bit deeper into the dough before baking.

the first cut is the deepest (I think I remember hearing something like that)
So, if you don't see the crust being crispy on the first picture, you can trust me that it is/was. It worked out really good. The bread tastes really nice. When you cut it open, it looks a bit pinkish - lovely.
If you are not so much into baking your own bread, honestly, you should have a go. This would maybe also a good idea for Food Revolution Day on May 19th: learning, how to bake your own bread.
When you buy your bread in the supermarket you don't know what really is in there. If you always buy your bread at the bakery you cannot be sure with every baker, or it maybe is a bit more costly. Whatsoever, if you do your own bread, you know what is in there, you can have a greater variety, you can have fun, and (look above) you can have exercise for free and don't have to go the gym.

Sunday, 1 April 2012

French baking - bâtard and boule with garlic

Now it's time again for baking bread. Getting out of bed in the morning becomes increasingly difficult depending on the time you go to bed. Consequently I started a bit later than usual. Apart from that I wanted to use the time before starting with the baking for a bit garden preparation, like getting some plants on the way for putting in the garden in a few weeks. I got some pumpkin seeds and some beans. Since last year the "giant" pumpkin was only a tiny thing I got myself something different this year: eatable decorative gourds. So I can decide later whether they make up for eating or just for decoration. However, that will not until September or October.
Anyway, back to the bread. Today the bread on the list was with garlic. Most of the ingredients and procedure remains the same, although I nearly ran out of strong baking flour, so I could only use 200 g instead of the 225 g - just took a bit more spelt flour. I need to stock up again on flour. The garlic is also running out quickly. If you like bruschetta, it's no wonder.
I had to reduce the luke warm water to 250 ml. If I had known that the dough still feels so wet I would have gone done further.
For this bread you need 6 cloves of garlic, which you cut in small cubes or kind of shape. You steam it briefly and roll it afterwards through some flour. After that you can add it to the dough when it has taken form after the first kneading.
How to proceed, you have to read in my older entries in connection with French bread.
To cover the dough while rising you can use a wet kitchen cloth or cling film. This time I went for cling film.
In this picture you can barely see the cling film. Whatsoever I can say right away that using cling film is not so good, because it, well, clings to much. Maybe there is a trick, but I didn't think about it. Therefore scraping the dough from the foil was on the program.
Here now the end result of the bread, although I must admit that it doesn't look much different on the picture when you compare it with the other pictures of the bread I put on earlier: 
Sure is, that the bread tastes nice again. So far I haven't been disappointed with the recipes from "Confessions of a French baker". If you are a garlic lover, you cannot go wrong with this bread.

Sunday, 25 March 2012

French baking - having a break

Well, it is Sunday again. Time for baking bread. That is normally, but today it didn't work out. I had a different appointment this morning, and therefroe no time for kneading and raising and baking bread. I will have to postpone then until next week. I already have the recipe for garlic bread ready, though. We will see later.

Sunday, 18 March 2012

French baking - bâtard with hazelnuts and apricots

Here goes another week. Somehow I can't do anything about it, I have to get up early on Sunday morning and bake bread. This time I took my well used recipe and added chopped up hazelnuts and chopped up dried apricots. They went in after all the major kneading.
However, the kneading was not so easy today. The dough felt so wet and it was very hard to knead it, although I used the same amount of flour and water as the times before. So I had to flour my hands quite a few times. It didn't have any negative effects on the end result, though. 


I was very much satisfied with the raising of the bread. Of course, I was satisfied with the taste as well. I couldn't resist and had to eat a few slices while the bread was still warm. Dangerous! Nevertheless, there is still some of the bread left. I could have it for teatime with some butter and jam, or simply butter, although it tastes quite nice without anything added.
I guess it would be very helpful to have a nice boulangerie nearby, but for that I would need to move long distance.

Sunday, 11 March 2012

French baking - bâtard with Roquefort

I don't know exactly why, but I got up at 5:30 this morning. Well, I couldn't sleep anymore. So I though I start baking bread. Only the first part needs your full attention, maybe 30-40 minutes. In the first step, after mixing the flour, salt, yeast, and luke warm water, I added nice Rouqefort cheese - that is if you like this kind of cheese. Important here was also to use less water, since the cheese adds liquid to the dough as well. Already while kneading the dough to free the gluten, you clearly recognize that you also release the smell of the cheese. I smelled it all the way thnrough the kneading.
The time for the first raising of the dough I could use to go to bed again and try to still sleep a bit. It worked somehow. Anyway, while the dough is raising you can do different things and use the time. Therefore, in fact, you don't need so much time directly for making the bread.
Comig back to the smell of the cheese, you can really "enjoy" it also while the bread is in the oven. My wife, though, did definetly not enjoy it. She said, it smells like dead goat. Well, I guess then, I have most of the bread to myself.


The first taste check was great - I love it. That is most likely because I like all sorts of cheese anyway.

Wednesday, 22 February 2012

French baking

After trying a recipe for baguettes from the book "Confessions of a French baker" I thought I could bake myself through the whole book bread by bread and write how it goes. Next would be "boules" and "bâtards".
The recipe mentions the usage of flour type 812 - to use half of the amount this flour and half type 550. However, it refers also to the base recipe for the bread dough, which just uses type 550 alone. So far I was not able to locate a shop selling type 812 flour. Before I find it somewhere I might just try it with using one type of flour instead. Since it takes some time to make bread, I can continue only once in a while.

Sunday, 19 February 2012

Baguette at home

Well, I thought I would need a baguette for the weekend. Unfortunately, in all the shops I looked for them they didn't have any left (maybe I should have gone a few hours earlier). So, no chance. There is still a baguette resting in peace in the freezer. I can't exactly remember how it ended up there, but I didn't fancy that particular one so much to revive it again. From experience I know this only leads to disappointment.
So, I have this book about French baking. Just got it yesterday. I went for it and tried making baguettes for myself. As a rough calculation that I took from the book for raising times, kneading, baking and so forth, I ended up with 3.5 hours. Not too bad.
First sifting the flour (Type 550) with a bit of salt, adding the yeast and 300 ml water - kneading for ten minutes - resting for ten minutes (the dough - not me) - kneading for 20 minutes - rising for 45 minutes - pre-modelling four baguettes - rising 25 minutes - finish forming of baguettes - 45 rising again - baking for 20 minutes - cooling for 30 minutes - enjoying.


The end result was not too bad, though something seemed to have gone wrong with the rising. The taste, however, was as good as I would expect from a fresh baguette. So despite some friends telling me you can't do a baguette for yourself, it worked.
But, if you want to do it you have to be ready for some work and really need to take time for it. Thinking about what was behind making baguettes for myself ...  well ... we are really spoiled and too often don't appreciate the things we buy.