Showing posts with label red wine vinegar. Show all posts

Thursday, 10 December 2020

It's a Beautiful Life - Anniversary - Beetroot Salad with Honey Mustard Dressing

Life is beautiful ... and so is my loving wife. I am so grateful I can be married to such a wonderful woman. Yesterday we had our wedding anniversary and it was a delicious day.

For some wedding anniversary may mean to get a gift for his wife like jewellery or something along that road. As for my wife she is very happy and content when I cook something lovely and delicious for her. Now you can judge for yourself what is easier, buying a piece of jewellery or passing quite some time in the kitchen cooking up something delicious.

Did I mention I was very grateful?

Well then, let's get into the food. First of all we started off with something healthy, a beetroot salad.


Ingredients:

2 pre-cooked beetroots, finely sliced

60 g lamb's lettuce

140 g mango, cut in cubes

20 g pumpkin seeds

20 g shavings of parmesan

Red wine vinegar

Olive oil

1 tsp Mustard

1 tsp Honey

Salt, pepper

Method:

The ingredients serve for two plates. This makes sense completely. After all, it was for our anniversary that we were celebrating the two of us.

Arrange the slices of beetroot on a plate, well two plates. Build a circle if you fancy so.

Arrange the lamb's lettuce in the center of the plate.

After that toss on the pieces of mango and the pumpkin seeds.

Then shave over the parmesan, maybe with a potato peeler.

For the dressing mix one part of red wine vinegar with triple the amount of olive oil in a jam jar, for example, together with the mustard, honey and salt and pepper. Dress the salad with ... eh ... this dressing.

Enjoy! Side fact: The beetroot is supposed to be good when you want to build muscles. If not, it's good anyway.

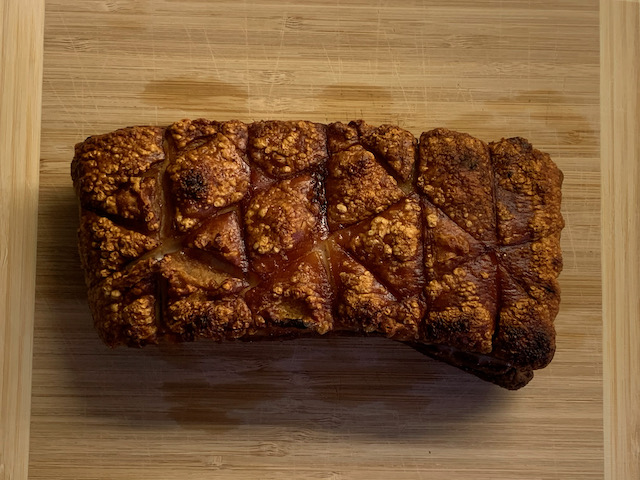
Of course, there was more. For the main plate I cooked up a nice and gorgeously crispy pork belly. It was so awesome.


The crispy pork belly was plated up with some browned potatoes and mushrooms glazed with a good knob of butter. I say it was very delicious. Did I mention the pork belly was so crispy with an awesomely good crunch?! Well, just wanted to make sure of it.


We had a lovely glass of white wine with it, a glass of Albariño, my wife brought along from A Coruña, Spain. Wonderful!


Then we finished the meal off with an espresso or two. But there has to be something more to it ...


... yes, of course, cake. On the inside a chocolate part and a vanilla part. Very good combination. All around it was coated with a chocolate ganache.


Thank you very much for joining us on our anniversary and for taking the time to read this blog post right to the end. All in all it was a really lovely day. Yes, life is beautiful!

Friday, 14 April 2017

Burn a Little - Bean and Feta Enchiladas and Steak

You can’t mess with time. Even if you could go back in time to change things you have done in the past, things will most probably end even worse.
What you could do, though, is a trip on memory lane, thinking about the things that you did and that happened and if you are clever enough, you could also learn from your mistakes. Or you could rediscover things you liked to do.
Anyway, today we will have at first some prawns and later something Mexican. After all we want some food. Some time ago, I bought a bag of Panko – Japanese breadcrumbs. I saw a dish on television – Panko Fried Prawns. For a long time I wanted to try it. Now I did.

Together with some chilli sauce it’s a lovely snack.
Side note: Just keep an eye on how much Panko Prawns you have going in the hot oil at the same time. If you use too many, the oil might just … eh … bubble over and spread on your oven top and … who knows what mayhem that might cause there.
Now we can go on with some Mexican food ...
Bean and Feta Enchiladas and Steak

The original idea was to make some vegetarian enchiladas, which indeed happened, but I felt I needed some more food, so I added the steak to the side. While the recipe mainly focuses on the Bean and Feta Enchiladas, I will mention a few things regarding the steak as well.
Ingredients:
Wheat tortillas
Creme fraîche
Chilli Sauce:

A splash of olive oil
1 clove of garlic, finely chopped
1 small onion, finely chopped
1-3 dried red chillies, finely chopped
400 ml tinned tomatoes
400 ml vegetables stock (or chicken stock for non vegetarian)
1 tbsp. dried oregano
1 tsp. sugar
A splash of red wine vinegar
Enchilada Filling:
A splash of olive oil
1 small onion, finely chopped
140 g sweet corn
1 red or green capsicum, chopped
250 g kidney beans
Salt, pepper
Bunch of parsley, chopped
200 g feta cheese

Method:
First of all, we need to do our own chilli sauce. Start in a sufficiently sized pan with a splash of olive oil at medium temperature.
Chuck in the garlic and the onion and have them work in the pan until translucent. Then add the chillies, the tinned tomatoes, the vegetable stock, the oregano and the sugar.
Bring it all to the boil and leave to simmer.
Now you have plenty of time to prepare the filling for the enchiladas.
Somehow, we start in a similar way, here – another pan and another splash of olive oil at medium heat. Toss in the onion and … you know … until translucent.
Add the sweet corn, capsicum and kidney beans. Season with salt and pepper and let it all simmer for a while until the vegetables have softened a tiny bit.
Remove the content of the pan to a bowl and let it cool down slightly. Then mix in the parsley and the feta.
Check the chilli sauce. If you where not super fast with the filling, you can remove the sauce from the heat now. If you don’t like all the chunks of onion and tomato in your sauce, you can pass the sauce through a sieve.
Get yourself an oven-proof dish, that will hold at least five enchiladas. Lightly oil it.
Then get yourself a plate. Place a wheat tortilla on it and spoon a bit of the chilli sauce on it. Spread the sauce onto the tortilla. Place a part of the filling on the tortilla, roll it up and place it in the oven-proof dish. Pack those enchiladas all nice and tightly in the dish. When all enchiladas are in the dish, pour over the remaining chilli sauce and transfer the dish to the oven for about 30 minutes at 180 °C.

Meanwhile you could prepare the steak, if you wish to have it.
Have some butter in a pan and cook the steak to your liking in it. Once you have removed the steak from the pan and leave it to rest, you have some pieces of tomato and some stripes of capsicum go into the fat. Season them with salt and pepper.
When everything is finished, you can plate up.
Place the tomatoes and capsicum first, the steak on top of it and some roasted onions on top of that (figure out yourself how to get those onions).
Put one enchilada on the side. You can garnish it with some chopped up parsley and add also a spoon of creme fraîche on the side to mellow the effect of the chilli sauce.
Enjoy!
Of course, I used three dried chillies in the sauce, but I didn’t feel it so much. So, don’t be afraid. While the chilli sauce itself might be quite hot, you won’t feel it so much in the finished product.
Lovely! I enjoyed my meal very much and I reckon and I keep on saying, I need some more Mexican food in my life and ... apart from that hot food will help you to burn and by that I don't just mean that it will burn in your mouth, but it could also aid you in burning off some fat you might not like in your body. I guess it always works for me.
Anyway ... keep enjoying your life and ... we will do the same here!

Wednesday, 16 April 2014

Warning: Extremely Delicious Vegetable Lasagne


Ha, you weren't expecting this. You thought this crazy guy would give you another one from his loose bottomed tart tin. Nope! Instead I give you something from the bottom of my heart and i hope you will love it too. Today I have a vegetable lasagne for you. 
Simple? Yes, but be warned, in my opinion this vegetable lasagne tastes extremely delicious. Of course, I have to say this, but there is only one way to prove me wrong. You would have to try it for yourself. Besides that, you will also find some ... eh ... what to call them ... eh ... let's try ... twists and an unexpected ingredient.
Less talking more cooking ...

Ingredients:
6 lasagne sheets
1 medium aubergine
2 small courgettes
A few splashes of olive oil
1 large tomato
1 clove of garlic
2 tbsp. tomato puree
100 ml water
50 ml red wine vinegar
A few basil leaves
Salt and pepper
200 ml crème fraîche
1 egg
A hand full of grated parmesan
3 tbsp. grated radish

Method:
The times I made a vegetable lasagne before, was to cook all the vegetables into a kind of sauce. However, we are not doing this today. We like to preserve the pure individual tastes of the single vegetables ... at least most of them. I was inspired to do it in a different way by watching an episode of MasterChef Australia.
Therefore we cut the aubergine and the courgettes in a way they fit to the lasagne sheets, that is they are going to be cut into fine slices. Then get a baking tray ready with some grease proof paper and heat up your oven to 180 ºC.
Be generous with salt to the sliced vegetables. Off into the oven they go for about 15-20 minutes. Just make sure, they don't get burned.
Meanwhile get your tomato sauce ready. Get a pan ready on heat. Be generous again. This time with olive oil in the pan. The ancient principle 'those who give bountifully, will receive bountifully' still applies.
Cut the tomato in small chunks and throw them into the hot oil to let them sizzle away. Finely chop your clove of garlic and toss it into the oil as well. When you start to smell the beautiful odour of the garlic on your kitchen add the tomato puree, the water and the red wine vinegar. Go through the sauce with a spoon and adjust the seasoning with salt and pepper. On a low heat reduce the sauce for a while. When the sauce is thick enough and you are almost finished use the basil leaves to finish off the sauce.
Before we can start putting the lasagne together we have two more jobs to do. The fist one is to pre-cook the lasagne sheets in boiling salted water for about three minutes. The second job is to prepare some kind of white sauce to put between the layers.
For this white sauce we simply ... yes, very simply ... spoon together, the crème fraîche, the egg, the parmesan and the grated radish. Well, I suppose you could use horseradish, too. 
Anyway, I used to have radish when I was way younger and then ... didn't have it for a long time. Due to the fact, that radish is in season right now, I thought I give it a go again. For sure I had something in mind for it, but I just ended up eating most of it raw. So far I never had used radish in cooking. Bravely I decided to grate some of it into my white sauce for my vegetable lasagne. Well, it worked ... well.
After this brief detour into my use of radish we get back to our lasagne. We are almost there.
Now get yourself a 20 cm x 20 cm oven-proof dish. Remember that the oven is still at 180 ºC. We start the lasagne with a splash of olive oil that you rub onto the bottom of your dish. Then a few slices of aubergine follow, two sheets of lasagne, white sauce, courgette, white sauce, lasagne sheet, aubergine courgette, white sauce, lasagne sheets and white sauce.
Well it all depends on the amount of sliced vegetables you have. Feel free to change things a tiny little bit. Just make sure, you have three layers of lasgane sheets.
Before the vegetable lasagne goes into the oven, grate some extra parmesan on top and while you are at it allow some olive oil to be drizzled on it, too.
The lasagne should go into the oven for about 15-20 minutes. It may look like this afterwards ...


You see, there is a bit of colour on it. If you want more, you have to give more. This vegetable lasagne will make for four humble portions, but be warned ... I said it before ... it tastes extremely delicious. So you might want to plan ahead for this.
Whatsoever. serve the lasagne with a few spoons of the tomato sauce on top.


You know, if you add more sauce there is more of it to enjoy and it will all drip onto your plate and you might want to do something with the plate later.
In my opinion, this vegetable lasagne was the best I had so far. You can still taste the aubergine and the courgette individual and you have a gorgeous tomato sauce, too.


I can only recommend to try it for yourself. I might be wrong here, but ... you'll never know if you don't go for it.

Speaking of going for it, this post will go to some blog challenges in no particular order ...

Elizabeth's No Waste Food challenge hosted by Ness at Jibber Jabber UK this month. Fine, I would never have thrown the remaining radish away, but here I used the left over radish in a delicious way.


Javelin Warrior's Made with Love Mondays. Check it out for yourself!

JWsMadeWLuvMondays

Helen's and Michelle's Extra Veg Blog Challenge. If I haven't used some extra veg here, I don't know and then again, I used the radish as I have never used it before.

Extra Veg Badge-003

Camilla's Credit Crunch Munch. Having a vegetarian meal with vegetables either on offer or in season or both will help you to save some money.

Credit Crunch Munch

Manjiri's and Jacqueline's Pasta Please challenge. The theme for April is Olive Oil. No, I wasn't especially generous with it because of this challenge. I just wanted to and found it necessary for the sauce to work properly.

pasta please

The Four Seasons Food April Challenge from Delicieux and Eat Your Veg. The goal was to celebrate vegetables. In my opinion ... again ... this is what this very vegetable lasagne is doing.


Then we have the Simple and in Season challenge from Ren. Do I have to say it again that radish is in season?

Simple and in Season NOW OPEN

Just because I can, I add this post to Recipe of the Week from Emily, too.

Link up your recipe of the week

Last but not least we have Karen's Cooking with Herbs challenge. Guess why?

Cooking with Herbs Challenge for April

Friday, 7 February 2014

Dangerous dieting, but soup is good for you - Winter Minestrone

I reckon, life can be quite dangerous as a food blogger ... when you are at least as crazy as I am ... at least. Otherwise, how would you call baking a Sachertorte just for your 2nd Blogiversary? As I don't throw away food, I will inevitably end up with having problems putting my trousers on. Yes, no help arrived in helping me eat that cake. 
Anyway, repeated incidents like this will turn you into being overweight. That can make life quite hard, especially when you want to go swimming at the Sea and at the same time activists of Greenpeace are nearby. For sure they will aid you in getting back into the Sea, where you obviously belong.
Now, you could also choose the way of dieting as some have the custom to do at the beginning of every year or ... no wonder ... close to the beach season. From the latter we are still far off.
In case you have found a diet that is working well for you beware that it isn't working too well. In order to help you with that I have some clues for you when to stop dieting ...

Thursday, 24 January 2013

Gemelli pasta vegetariana al forno

You know what? I eat every day and not just once. Well, there is nothing special about that. Most do. So I really don't need to mention it. However, I don't eat every day the same, not even every week according to some kind of schedule. I know, some do that and the same dishes come reappearing week after week.
That doesn't need to be! Our planet is full of so many lovely ingredients. Those can be combined in various ways. Let's take just 10 ingredients. How many different dishes could you do with them? Let me know!
Now we like to focus on pasta, there is such a great variety. Here now something I came up with today. I didn't even need to do some extra shopping to get it done. It was all there already. Besides that, some things had to be used anyway ...


Lacking another name, I just called it Gemelli pasta vegetariana al forno. 'Gemelli' is the name of the pasta I used. So if you are going to use a different one, it might be called Orecchiette pasta vegetariana al forno. 
'Vegetariana' is obvious to you, I hope. So if you are putting any kind of meat to it, you have to cancel the vegetariana and ending up with Gemelli pasta al forno or Orecchiette pasta respectively. 
Then we have the 'al forno' left referring to the fact that it is baked in the oven. So, finally, if you are too greedy and don't want to send the dish to the oven you end up with 'Gemelli pasta vegetariana' or 'Orecchiette pasta vegetariana' or even with 'Farfalle pasta vegetariana' and if you put in some meat you have 'Gemelli pasta', 'Orecchiette pasta' or 'Farfalle pasta', which in my opinion would sound simply dull and wouldn't do any good.
On the other hand we could mention some more of the vegetarian ingredients, which could then lead us to ... wait ... that got already a bit far, but maybe you can figure out some other names by looking at ...

 ... the ingredients:
Various splashes of olive oil
2 cloves of garlic, finely chopped
1 onion, finely chopped
1 yellow bell pepper, cut into small pieces
500 g of tinned tomatoes
250 g cannellini beans
Dried oregano
Salt and pepper
Splash of red wine vinegar
500 g dried Gemelli pasta (you might even want to use Fusilli)
50 g grated Parmesan
125 g mozzarella (one ball)

The Preparation:
Heat up the first splash of olive oil in a large pan. Then gently fry the garlic and onion for about 10 minutes. Enjoy the smell of the garlic!
Now add the bell pepper, tomatoes, beans and a bit of water. Bring it to the boil and let it simmer for about 30 minutes.
That gives you plenty of time to cook the pasta. Prepare them according to the directions of the package, but ... reduce 2 minutes from the mentioned time. Give the pasta some love and attention. Who wouldn't like that ... love and attention! 
Reserve a bit of the cooking water of the pasta.
Season the sauce with salt, pepper and dried oregano according to your taste or for those, whom you are cooking for. Show some consideration! 
By the way, you could also start heating up the oven to 200°C.
It's time to turn off the heat for the sauce. Add a splash of red wine vinegar and grate in the Parmesan. You could also add some of the reserved cooking water, if you have the feeling that things are looking too dry.
Then mix it all together with the pasta. You could do that either in the pan or in your dish you are putting into the oven.
Is everything in the oven-proof dish? Good! Tear the mozzarella ball apart and spread the individual pieces on your pasta. Season with some extra dried oregano on top and sprinkle another splash of olive oil over the pasta and mozzarella. Off it goes to the oven for 30 minutes!


After you have plated up the pasta al forno and are ready to eat it, you could sprinkle yet another splash of olive oil over it ... Enjoy your pasta! What do YOU like to call it?

Just looking at this last photo, I get reminded that I wanted to get some nice white plates. I guess it will work out one day ...

I might even survive a few more days with all my stored items ...